How to Join Plywood - Introduction
Welcome to the world of woodworking, where plywood transforms from mere panels into seamless masterpieces through the art of glueing and joining. Whether you're a novice or a seasoned woodworker, this guide will empower you with the skills and confidence to tackle your project like a pro.
Step 1: Selecting the Right Glue
The journey begins with choosing the perfect glue for the task at hand. Opt for aliphatic wood glue, such as Titebond II or Gorilla Glue Carpenter’s Wood Glue, renowned for its ease of use, robust adhesion, and water-cleanable properties. Avoid superglue, as its rapid drying time compromises the strength of the bond.
Step 2: Preparing Your Plywood
Before diving into glue application, ensure your plywood is primed for bonding:
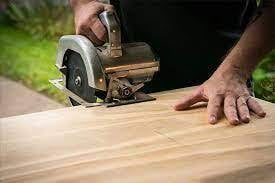
- Precision Cutting: Utilise a sharp saw for clean, precise cuts, as rough edges hinder adhesive efficacy.
- Smooth Sanding: Achieve optimal adhesion by lightly sanding both surfaces to eliminate any dust or debris.
- Trial Fitting: Dry-fit your plywood pieces to verify alignment, ensuring a seamless join.
Step 3: Applying the Adhesive
You can edit text on your website by double clicking on a text box on your website. Alternatively, when you select a text box a settings menu will appear. your website by double clicking on a text box on your website. Alternatively, when you select a text box
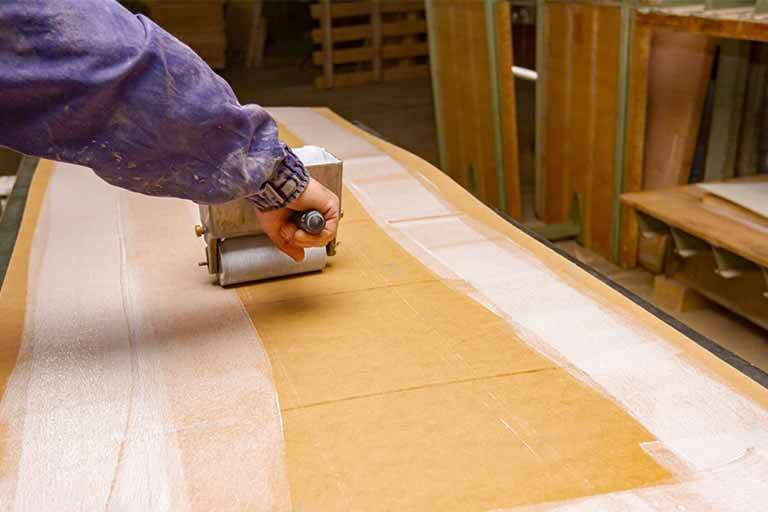
Now, it's time to spread the glue! Employ a brush or roller to apply a thin, uniform layer onto one of the joining surfaces. Exercise restraint to avoid excess glue, which compromises joint integrity.
Step 4: Securing with Clamps
Enter the clamps! Secure the glued pieces firmly, distributing even pressure across the entire joint. Employ adequate clamping to eliminate gaps and fortify the bond. In the absence of clamps, improvise with substantial weights like books or bricks.
Step 5: Patience is a Virtue
Exercise restraint as the glue sets. Refer to the manufacturer's instructions for drying time, varying based on the glue brand and application thickness. Resist the temptation to disturb the joint prematurely.
Step 6: Tidying Up
As the glue cures, address any squeeze-out around the joint with a damp cloth to maintain a tidy workspace and project.
Exploring Basic Joints:
While our guide covers basic butt joints, the world of plywood joinery offers a plethora of advanced techniques:
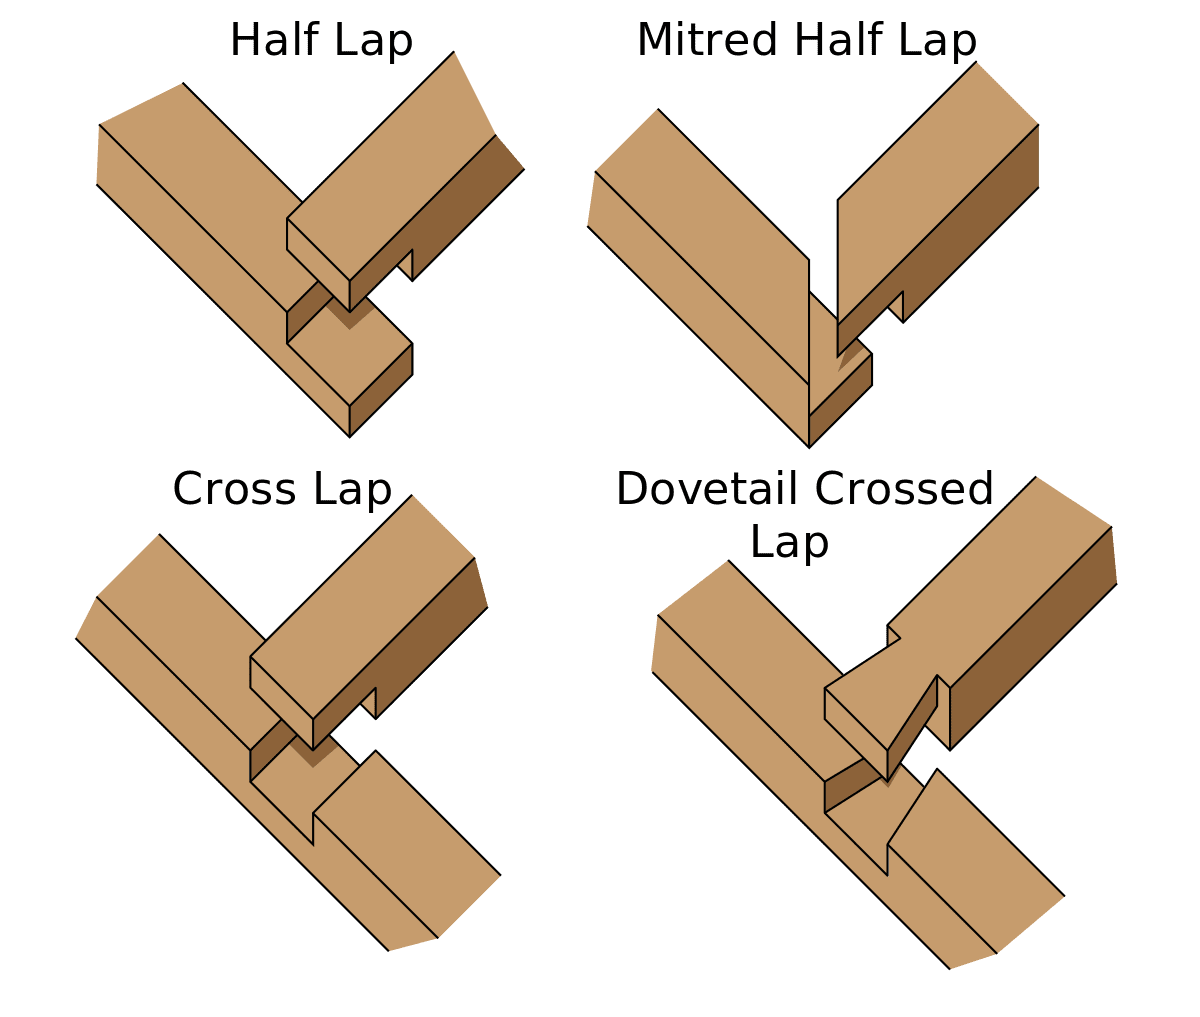
- Lap Joints: Enhance bond strength through overlapping plywood pieces.
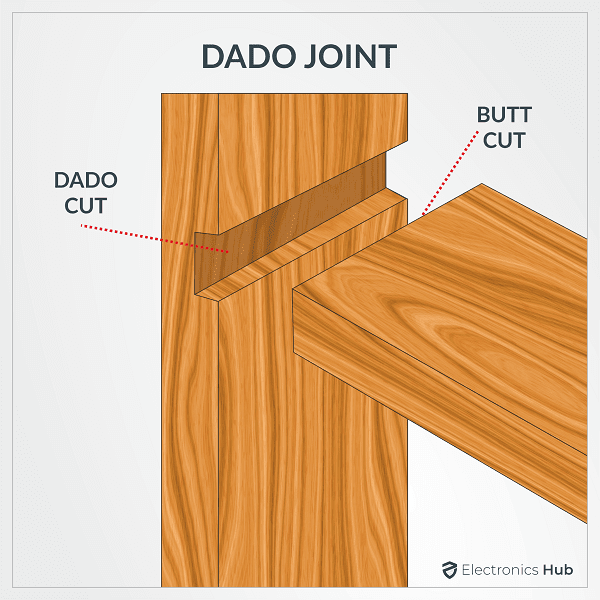
- Dado Joints: Create flush, secure joints by cutting grooves for piece insertion.
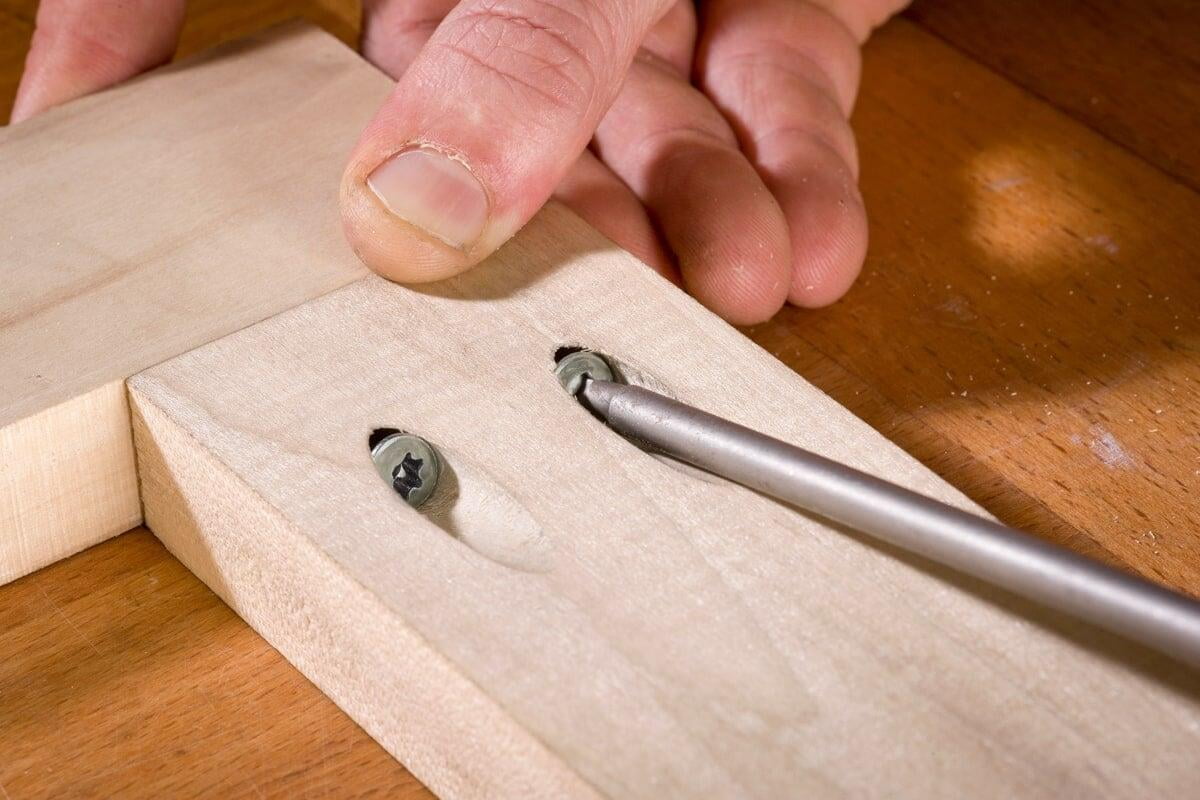
- Pocket Hole Joints: Conceal screws within the joint for a seamless, visible surface.
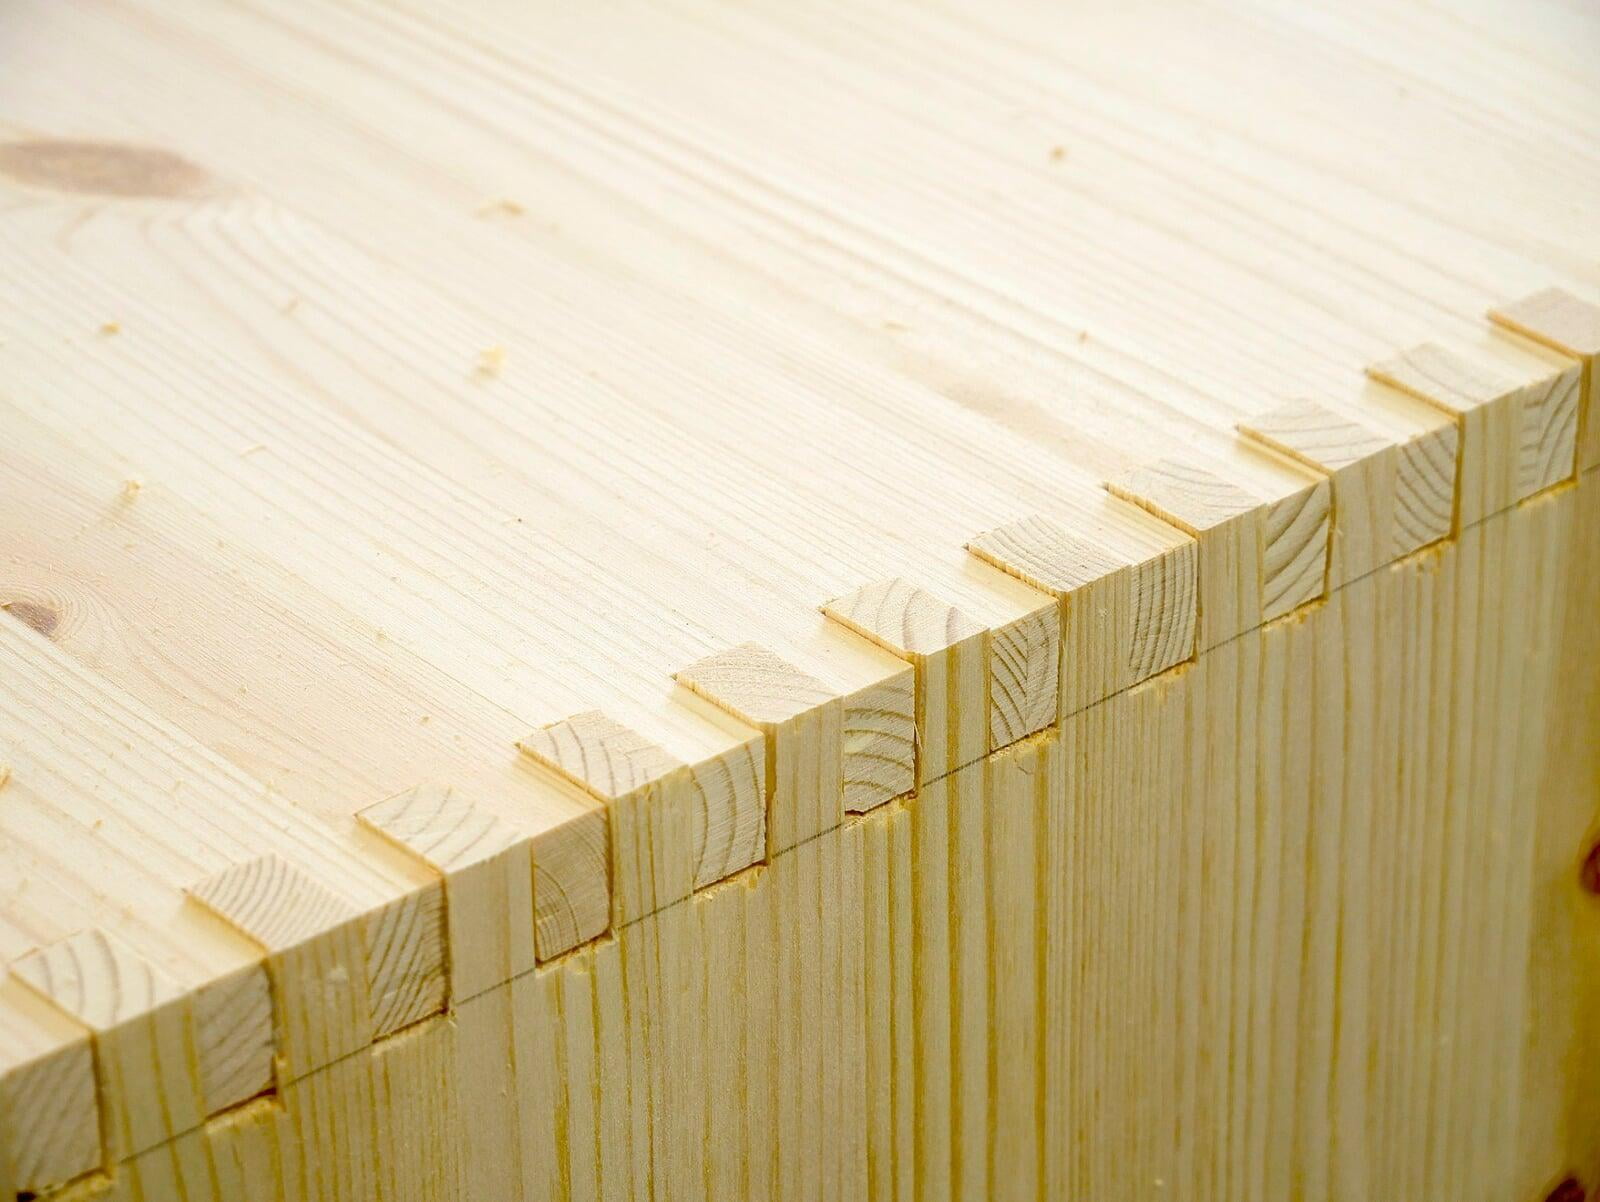
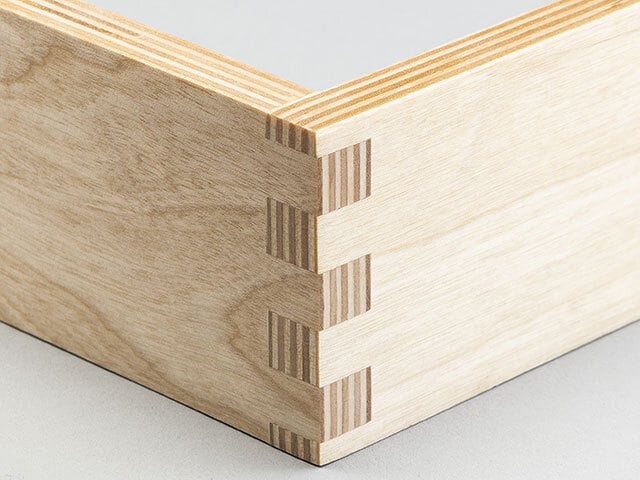
-FingerJoints: The profiles of each side expand the glueing surface area, leading to a robust bond that surpasses that of a butt joint.
Conclusion
In summary, mastering plywood joinery involves meticulous glue selection, precise plywood preparation, careful adhesive application, secure clamping, patient waiting, and diligent cleanup. Remember, practice breeds perfection! Embrace experimentation with diverse techniques and adhesives to unlock the full potential of your woodworking projects. With each endeavour, you inch closer to woodworking mastery.